
Custom water cooling kits offer superior thermal performance, quieter operation, and stunning visual appeal for high-end PCs. Whether you’re building a gaming rig or a content creation workstation, choosing the right kit can make all the difference in performance and style.
Key Takeaways
- Superior Cooling Performance: Custom water cooling kits provide more efficient heat dissipation than air coolers, especially under heavy workloads like gaming or rendering.
- Quieter Operation: With larger radiators and optimized fan curves, liquid cooling systems run significantly quieter than traditional air cooling setups.
- Enhanced Aesthetics: RGB lighting, clear tubing, and custom loop designs allow for stunning visual customization that air coolers simply can’t match.
- Modular and Scalable: Most kits are expandable, letting you add GPU blocks, extra radiators, or reservoirs as your system grows.
- Easier Installation Than You Think: Pre-assembled kits reduce complexity, making custom loops accessible even to first-time builders.
- Long-Term Value: While the initial cost is higher, the durability and performance gains offer excellent long-term value for enthusiasts.
- Compatibility Matters: Always check socket support, case clearance, and component compatibility before purchasing a kit.
📑 Table of Contents
Introduction to Custom Water Cooling
Building a high-performance PC is about more than just picking the fastest CPU or GPU. It’s about creating a balanced system that runs cool, stays quiet, and looks amazing. That’s where custom water cooling kits come in. Unlike all-in-one (AIO) coolers, custom loops give you full control over every component—from the pump and reservoir to the tubing and coolant. This level of customization not only improves thermal performance but also opens the door to breathtaking aesthetics.
You might be thinking, “Isn’t water cooling complicated and risky?” It’s a fair concern. Years ago, setting up a custom loop required soldering, leak testing, and a steep learning curve. But today’s best custom water cooling kits are designed with beginners in mind. They come pre-filled, pre-tested, and often include detailed instructions. Whether you’re a seasoned overclocker or a first-time builder looking to level up your rig, there’s a kit out there that fits your needs.
Why Choose a Custom Water Cooling Kit?
So, why go custom when AIO coolers are easier and cheaper? The answer lies in performance, noise levels, and personalization. Custom water cooling kits offer better thermal efficiency because they can cool both the CPU and GPU using a single, unified loop. This means lower temperatures across the board, especially during intense tasks like 4K gaming, video editing, or 3D rendering.
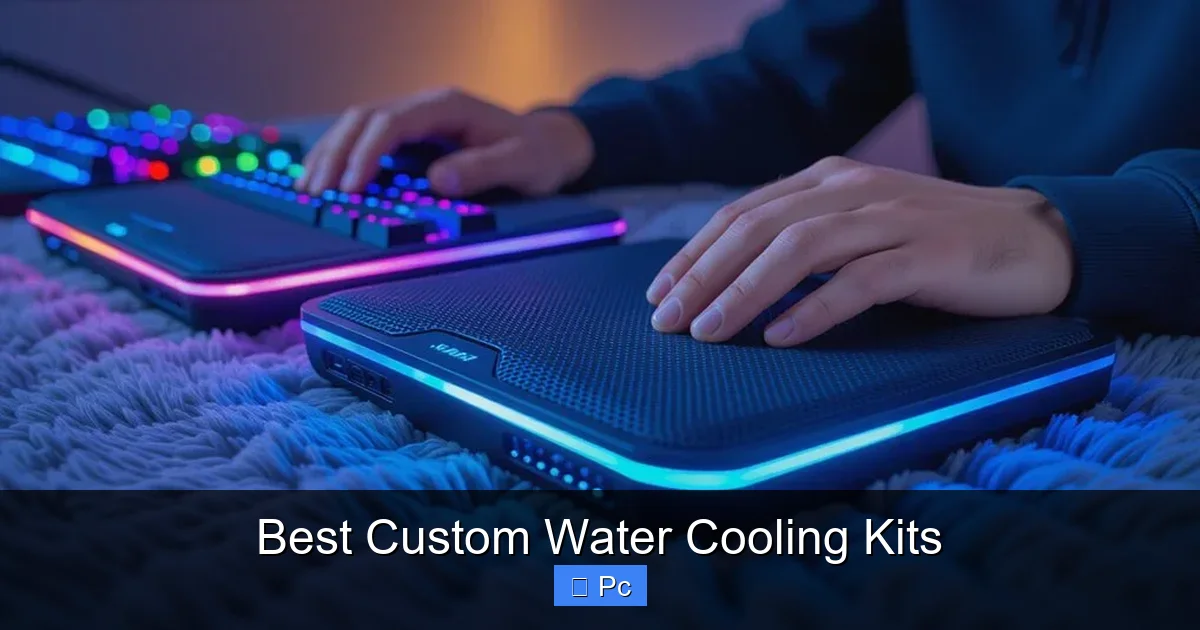
Visual guide about Best Custom Water Cooling Kits
Image source: howtotechinfo.com
Another major advantage is noise reduction. Air coolers rely on multiple high-speed fans that can get loud under load. In contrast, custom loops use larger, slower-spinning fans on radiators, which move the same amount of air with far less noise. Plus, with fewer fans needed inside the case, airflow is cleaner and more efficient.
Performance Benefits
Custom water cooling excels in heat dissipation. Water has a much higher thermal capacity than air, meaning it can absorb and transfer heat more effectively. This leads to lower CPU and GPU temperatures—often 10–20°C cooler than high-end air coolers. For overclockers, this translates to higher stable clock speeds and better benchmark scores.
For example, a system running an Intel Core i9-13900K or AMD Ryzen 9 7950X under full load can easily hit 90°C or more with air cooling. With a well-designed custom loop, those temperatures can drop into the mid-60s, giving you headroom for aggressive overclocking without thermal throttling.
Noise Reduction
Silence is golden, especially if you use your PC for streaming, recording, or late-night gaming. Custom loops reduce noise in two ways: fewer fans and lower fan speeds. Radiators typically use 120mm or 140mm fans that spin at 800–1200 RPM, compared to the 2000+ RPM often needed on air coolers. The result? A whisper-quiet system that doesn’t distract from your content or gameplay.
Aesthetic Customization
Let’s be honest—custom water cooling looks incredible. With options for colored coolant, RGB lighting, and transparent tubing, you can create a PC that’s as much a piece of art as it is a machine. Whether you prefer a sleek, minimalist look or a vibrant, cyberpunk-inspired build, the possibilities are nearly endless.
Many kits now include addressable RGB components that sync with software like ASUS Aura Sync, MSI Mystic Light, or Corsair iCUE. This lets you coordinate lighting effects across your entire system, from the pump to the fans to the RAM.
Top Custom Water Cooling Kits in 2024
The market for custom water cooling kits has exploded in recent years, with brands offering everything from beginner-friendly starter kits to professional-grade modular systems. Here are some of the best options available in 2024, each catering to different needs and budgets.

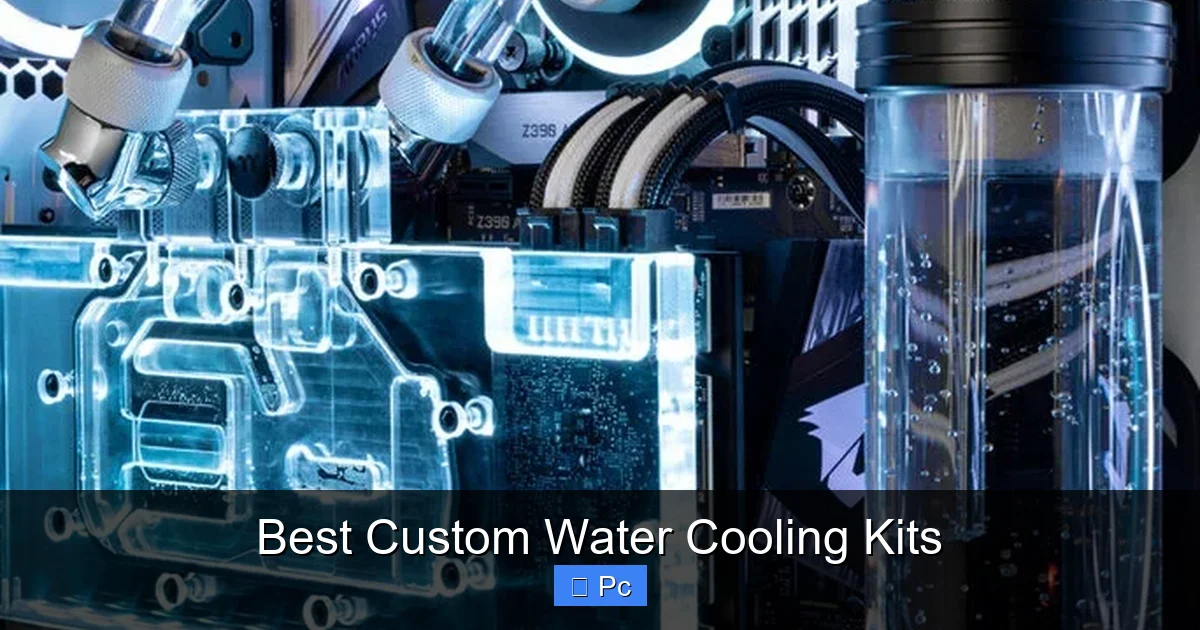
Visual guide about Best Custom Water Cooling Kits
Image source: leaguefeed.net
EKWB EK-Quantum Custom Loop Starter Kit
EKWB is a legendary name in the water cooling world, and their EK-Quantum Custom Loop Starter Kit is one of the most popular choices for first-time builders. This kit includes everything you need to cool your CPU: a D5 pump/reservoir combo, CPU water block, 360mm radiator, fittings, tubing, and coolant. It’s compatible with all major CPU sockets, including Intel LGA 1700 and AMD AM5.
What sets this kit apart is its high-quality components and detailed installation guide. The pump is whisper-quiet, and the nickel-plated copper water block ensures excellent thermal transfer. The kit also supports future expansion—you can easily add a GPU block later if you want to cool your graphics card too.
Alphacool Eisbaer Aurora LT 360
If you’re looking for a hybrid between an AIO and a custom loop, the Alphacool Eisbaer Aurora LT 360 is a fantastic option. It comes pre-filled and pre-assembled, so you can install it like a regular AIO, but it also includes quick-disconnect fittings that let you expand into a full custom loop later.
This kit features a 360mm radiator, RGB lighting on the pump head, and compatibility with both Intel and AMD platforms. It’s ideal for users who want the performance of custom cooling without the initial complexity. Plus, the Aurora series supports daisy-chaining multiple units, so you can cool both CPU and GPU with separate loops if desired.
Bykski CK-360-KIT
Bykski is known for its affordable yet high-performance cooling solutions, and the CK-360-KIT is a great entry point for budget-conscious builders. This kit includes a 360mm radiator, D5 pump, CPU block, tubing, and coolant—all for a fraction of the price of premium brands.
While it doesn’t have the same level of polish as EKWB or Alphacool, the Bykski kit delivers solid performance and is perfect for those dipping their toes into custom cooling. It’s also highly expandable, with support for GPU blocks and additional radiators.
CustomPC Labs Modular Loop Kit
For advanced users who want maximum flexibility, the CustomPC Labs Modular Loop Kit is a top-tier choice. This kit is sold as individual components, allowing you to build a loop tailored to your exact needs. You can choose the pump, reservoir, radiator size, and even the type of tubing (hardline or soft).
This level of customization is ideal for enthusiasts who want to build a showpiece PC or push their hardware to the limit. The kit supports multi-GPU setups, extreme overclocking, and even external radiator mounts. Just be prepared for a steeper learning curve and higher cost.
What to Look for in a Custom Water Cooling Kit
Not all custom water cooling kits are created equal. To get the best performance and value, it’s important to know what to look for before you buy. Here are the key factors to consider.
Visual guide about Best Custom Water Cooling Kits
Image source: pcmecca.com
Compatibility
Before anything else, make sure the kit supports your CPU socket and fits in your case. Most kits list compatibility for Intel LGA 1700, 1200, and AMD AM5, AM4, but double-check to avoid surprises. Also, measure your case to ensure there’s enough space for the radiator—360mm radiators need at least 390mm of clearance.
Pump and Reservoir Quality
The pump is the heart of your loop. Look for a reliable D5 or DDC pump with adjustable speed control. A good reservoir ensures consistent coolant flow and makes filling and bleeding the loop much easier. Integrated pump/reservoir combos save space and simplify installation.
Radiator Size and Thickness
Larger radiators dissipate more heat. A 360mm radiator is ideal for most builds, but if you’re cooling both CPU and GPU, consider a 480mm or dual-radiator setup. Thicker radiators (up to 60mm) offer better cooling but require more case space and stronger fans.
Tubing and Fittings
Soft tubing is easier to work with and more forgiving for beginners. Hardline tubing looks cleaner but requires precise cutting and bending. Make sure the kit includes enough tubing and the right fittings (G1/4” is standard). Compression fittings are preferred over barb fittings for a leak-free seal.
Coolant Type
Most kits come with pre-mixed coolant, but you can customize the color later. Avoid using tap water—it contains minerals that can clog your loop. Distilled water with additives or pre-mixed coolant is the safest choice. Some users prefer opaque coolants for a clean look, while others go for vibrant dyes.
Expandability
If you plan to upgrade your GPU or add more components later, choose a kit that supports expansion. Look for kits with extra ports, quick-disconnect fittings, or modular designs. This future-proofs your investment and saves you from rebuilding the entire loop.
Installation Tips for Beginners
Installing a custom water cooling kit might seem intimidating, but with the right approach, it’s totally doable—even for first-timers. Here’s a step-by-step guide to help you get started.
Plan Your Loop
Before you touch a screwdriver, sketch out your loop layout. Decide the order of components: typically pump → radiator → CPU → (optional GPU) → back to pump. Keep tubing runs as short and direct as possible to reduce flow resistance.
Mount the Radiator and Fans
Install the radiator in your case first—usually at the top or front. Make sure the fans are set to push or pull air through the radiator, not against it. Use anti-vibration pads to reduce noise.
Install the Pump and Reservoir
Mount the pump/reservoir combo in a stable location, preferably upright to prevent air bubbles. Use rubber mounts to dampen vibrations. Connect the inlet and outlet ports according to the manual.
Install the CPU Water Block
Remove the stock cooler and clean the CPU surface. Apply a thin layer of thermal paste (most blocks come with pre-applied paste). Secure the water block using the included mounting hardware. Double-check alignment to avoid leaks.
Cut and Install Tubing
Measure and cut your tubing to length. Use a tube cutter for clean edges. Insert the tubing into the fittings and secure with clamps if needed. For hardline tubing, use a bending tool to avoid kinks.
Fill and Bleed the Loop
Fill the reservoir slowly with coolant. Power on the pump at low speed to circulate the fluid. Tilt the case gently to help air bubbles rise and escape. Repeat until the loop runs smoothly with no bubbles.
Test for Leaks
Run the system for 24 hours without powering on the PC. Check all connections for leaks. If everything looks good, you’re ready to boot up and enjoy your new cooling setup.
Maintenance and Long-Term Care
One common myth about custom water cooling is that it requires constant maintenance. In reality, a well-built loop can run for years with minimal upkeep. However, a little care goes a long way in ensuring longevity and performance.
Annual Coolant Change
Over time, coolant can degrade, algae can grow, and particles can accumulate. Most experts recommend changing the coolant every 12–18 months. Drain the old fluid, flush the loop with distilled water, and refill with fresh coolant.
Check for Leaks and Corrosion
Inspect your loop regularly for signs of leaks, especially around fittings and the pump. Look for discoloration or corrosion on metal parts. If you notice anything unusual, address it immediately to prevent damage.
Clean the Radiator
Dust buildup on the radiator reduces cooling efficiency. Use compressed air to clean the fins every few months. For stubborn grime, remove the radiator and wash it with mild soap and water.
Monitor Temperatures
Use software like HWMonitor or AIDA64 to keep an eye on your CPU and GPU temps. Sudden spikes could indicate a blockage, air bubble, or pump failure. Catching issues early prevents costly repairs.
Common Mistakes to Avoid
Even with the best kit, mistakes can happen. Here are some common pitfalls and how to avoid them.
Over-Tightening Fittings
It’s tempting to crank down fittings to prevent leaks, but over-tightening can crack ports or strip threads. Use hand-tight pressure and a quarter-turn with a wrench—no more.
Ignoring Air Bubbles
Air trapped in the loop reduces cooling efficiency and can damage the pump. Always bleed the loop thoroughly before finalizing the build.
Using the Wrong Coolant
Never use tap water, alcohol, or automotive coolant. These can corrode components or clog the loop. Stick to distilled water with additives or pre-mixed coolant.
Skipping the Leak Test
Rushing to boot up your PC without a leak test is a recipe for disaster. Always test the loop externally for at least 24 hours before connecting it to your components.
Poor Cable Management
Custom loops already add complexity. Don’t make it worse with tangled cables. Use zip ties and routing channels to keep everything neat and improve airflow.
Conclusion
Custom water cooling kits are no longer just for hardcore enthusiasts. With user-friendly designs, detailed guides, and expandable options, they’re accessible to anyone looking to boost their PC’s performance, silence, and style. Whether you choose a premium kit from EKWB, a hybrid solution from Alphacool, or a budget-friendly option from Bykski, you’re investing in a cooler, quieter, and more visually stunning system.
The best custom water cooling kit is one that matches your skill level, budget, and aesthetic goals. Take the time to research, plan your build, and follow best practices. With a little patience and care, you’ll enjoy the benefits of liquid cooling for years to come. So go ahead—dive in, build something amazing, and turn your PC into a true masterpiece.
Frequently Asked Questions
Are custom water cooling kits hard to install?
Not as hard as you might think. Many modern kits are designed for beginners and come with detailed instructions. With careful planning and patience, most users can install a custom loop in a few hours.
Can I cool both my CPU and GPU with one kit?
Yes, many custom water cooling kits support dual-component cooling. You’ll need a larger radiator (480mm or dual 360mm) and a GPU water block, but it’s a great way to maximize performance and aesthetics.
Do custom loops leak?
Leaks are rare with quality components and proper installation. Always perform a 24-hour leak test before powering on your PC. Using the right fittings and avoiding over-tightening also reduces risk.
How often do I need to maintain my custom loop?
Basic maintenance includes changing the coolant every 12–18 months and cleaning the radiator every few months. Regular temperature monitoring helps catch issues early.
Are custom water cooling kits worth the cost?
For high-performance builds, overclockers, or users who value quiet operation and aesthetics, custom kits offer excellent long-term value. The performance gains and visual impact often justify the higher upfront cost.
Can I use RGB lighting with my custom loop?
Absolutely. Many kits include RGB pumps, reservoirs, and fans that sync with popular lighting software. This lets you create stunning, coordinated lighting effects across your entire system.