
Need to remove a stuck lens filter from your Canon camera quickly? This guide shows you simple, fast methods for safely detaching a stubborn filter without damaging your lens.
Key Takeaways
- Gently twist counter-clockwise to remove a Canon lens filter.
- Use a rubber grip or jar opener for better traction on stuck filters.
- Apply gentle, even pressure to avoid lens damage.
- Try the “rubber band trick” for extra grip.
- If a filter is severely stuck, advanced techniques may be needed.
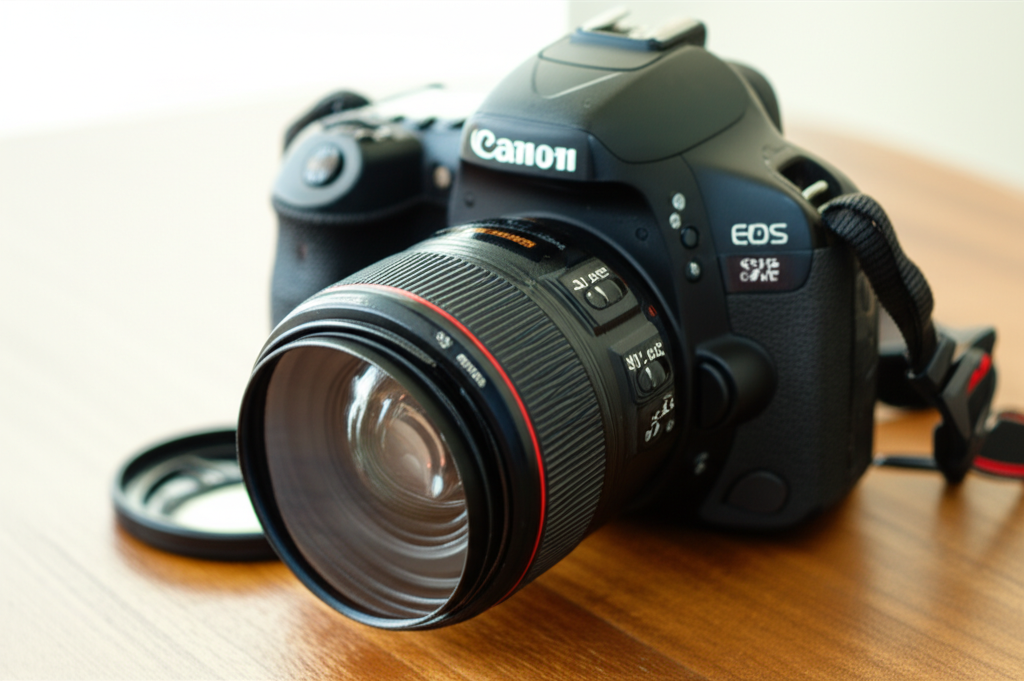
You’ve just finished a fantastic photo session, and as you go to remove your Canon lens filter, you realize it’s stuck fast. It’s a common and frustrating problem for photographers of all levels. That protective UV filter or creative effect lens might be tightly adhered to your Canon lens, making you worry about how to remove lens filter Canon without causing damage. Don’t panic! This comprehensive guide will walk you through simple, effective methods to remove that stubborn filter quickly and safely, so you can get back to shooting.
Why Do Canon Lens Filters Get Stuck?
Several factors can cause a lens filter to become difficult to remove from your Canon camera lens. Understanding these reasons can help you prevent future issues and approach removal with the right mindset. Often, it’s a combination of physics and environmental conditions.
Material Expansion and Contraction
Lens filters, especially those with metal threading, are susceptible to temperature changes. If you move from a warm environment to a cold one, or vice-versa, the metal can expand or contract. This subtle shift can tighten the filter’s grip on the lens threads. Think of it like a screw that’s slightly harder to turn after being exposed to different temperatures.
Cross-Threading
This is perhaps the most common culprit. If a filter isn’t screwed on perfectly straight, the threads can become misaligned. When you try to tighten it, or even just over time, the crossed threads can essentially bind together, making removal a challenge. It’s like trying to force two interlocking pieces of a puzzle that aren’t meant to go together that way.
Dirt, Sand, or Debris
Tiny particles of dust, sand, or even salt from a beach environment can get lodged between the filter and lens threads. These abrasive particles can act like tiny wedges, increasing friction and making the filter harder to turn. Imagine trying to unscrew a bolt with a bit of grit stuck in the threads – it’s much tougher.
Over-Tightening
Sometimes, the simplest explanation is the most likely. You, or someone else, might have simply tightened the filter too much. While it’s good to ensure a secure fit, excessive force can deform the threads slightly or press them together with immense pressure, leading to a difficult removal.
Corrosion or Oxidation
Less common, but still possible, is minor corrosion or oxidation, particularly if the filters or lens threads have been exposed to moisture and then not dried properly. This can create a bond that resists movement.
How To Remove Lens Filter Canon: Step-by-Step Guide
When faced with a stuck filter, the key is patience and applying the right amount of force. Always aim for a gentle approach first. Damaging your lens threads would be a far greater problem than a stuck filter.
Step 1: Assess the Situation
Before you start twisting aggressively, take a moment to look at the filter. Is it slightly crooked? Do you see any obvious debris? Understanding the potential cause can inform your removal strategy. Gently try to rotate the filter by hand, counter-clockwise (remember, “lefty loosey”). See if there’s any give at all. If it budges even a little, that’s a good sign.
Step 2: Ensure a Firm Grip
Your hands alone might not provide enough grip, especially if the filter has a smooth outer edge or your hands are slightly oily. This is where everyday items can help you get a better hold.
Using a Rubber Grip or Jar Opener
A rubber jar opener or even a rubber glove can significantly increase your grip. Place the rubber material around the filter and try to twist. The increased friction makes it easier to apply controlled force. This is a fantastic way to solve how to remove lens filter Canon without special tools.
The Rubber Band Trick
This is a classic photographer’s hack. Wrap one or two thick rubber bands tightly around the edge of the filter. The rubber bands provide extra friction, giving your fingers more to hold onto. Once wrapped, grip the rubber bands and the filter firmly and attempt to unscrew it counter-clockwise.
Step 3: Apply Gentle, Even Pressure
When you start twisting, apply steady, even pressure. Avoid jerky movements, which can torque the lens or filter threads. The goal is to break the seal or resistance gradually. Remember, you’re unscrewing, not prying.
Step 4: The “Tap and Twist” Method
If gentle twisting isn’t working, you can try a very mild percussive technique. With the filter still in place, gently tap the edge of the filter with the handle of a screwdriver or a similar blunt object. The idea isn’t to hit it hard, but to create a slight vibration. Sometimes, this subtle shock can help loosen the threads. Immediately after tapping, try twisting the filter again with a good grip.
Step 5: Consider a Filter Wrench (Use with Caution)
For extremely stubborn filters, a dedicated filter wrench or pliers designed for lens filters might be an option. However, these must be used with extreme caution. They grip the filter and apply leverage, but can also easily damage the filter or the lens threads if not used properly. If you choose this route, ensure the tool has rubberized or soft jaws to prevent scratching and apply pressure very carefully and evenly.
Here’s a comparison of common grip-enhancing tools:
| Tool | Pros | Cons | Best For |
|---|---|---|---|
| Rubber Glove/Jar Opener | Readily available, good grip, low risk of damage | May not be enough for very stuck filters | Slightly stuck filters, general use |
| Rubber Bands | Extremely accessible, customizable grip | Can be fiddly to apply perfectly, may slip if not tight | Moderately stuck filters, quick solutions |
| Filter Wrench | Provides significant leverage, effective for very stuck filters | Higher risk of lens/filter damage if misused, requires purchase | Severely stuck filters, professionals |
Step 6: Cold or Heat Treatment (Advanced, Proceed with Caution)
In extreme cases, you can try using temperature to your advantage, but this method carries a risk of damaging your lens elements or coatings if not done carefully. The principle is to make the outer ring (the filter) expand or contract differently from the inner ring (the lens thread).
- Cooling: Place the lens (filter attached) in a refrigerator for about 30 minutes. Do NOT put it in a freezer, as this can cause condensation. The slight contraction of the metal might loosen the threads.
- Heating: Alternatively, you can try warming the filter. You can do this by holding a warm (not hot!) washcloth against the filter for a minute or two. Again, avoid excessive heat.
Immediately after applying temperature, try to unscrew the filter. Be aware that rapid temperature changes can sometimes cause more problems, so this is best reserved for last-resort situations.
Pro Tip: Protecting Your Threads
When attaching filters, always align the threads carefully. Screw them on gently until they are snug, but never force them. A good rule of thumb is to tighten them only as much as you would tighten a lightbulb – enough to be secure, but not so much that it requires significant effort to remove.
Dealing with Specific Canon Lens Models
While the basic principles apply to all Canon lenses, some specific models might have particular characteristics. For instance, very wide-angle lenses often have shorter filter threads, which can sometimes make filters stick more easily if cross-threaded. Conversely, larger telephoto lenses might have filters that are simply heavier and tighter due to their size.
General Canon Lens Thread Sizes
Canon offers lenses in a wide range of filter sizes, from small 49mm filters on entry-level primes to large 82mm or even larger filters on professional zoom lenses. While the size doesn’t inherently make a filter more prone to sticking, larger filters might feel tighter due to the increased surface area of the threads.
Here’s a look at common filter thread sizes for popular Canon lens categories:
| Lens Type | Typical Filter Diameter (mm) | Notes |
|---|---|---|
| Entry-Level Prime Lenses (e.g., 50mm f/1.8) | 49mm, 52mm | Often smaller, easier to manage |
| Mid-Range Zooms (e.g., 24-70mm f/2.8) | 67mm, 72mm, 77mm | Standard professional sizes |
| Telephoto Zooms (e.g., 70-200mm f/2.8) | 67mm, 72mm, 77mm, 82mm | Can vary, some use rear filters |
| Wide-Angle Zooms (e.g., 16-35mm f/2.8) | 77mm, 82mm | May have shorter threads, requiring careful attachment |
| Macro Lenses | 52mm, 58mm, 67mm | Sizes vary widely based on focal length |
The process for how to remove lens filter Canon remains consistent regardless of the size. The crucial part is the technique and pressure applied.
When to Seek Professional Help
If you’ve tried all the gentle methods, including grip enhancers and even mild temperature changes, and the filter still won’t budge, it might be time to seek professional help. A camera repair shop or a reputable camera store has specialized tools and experience to remove stuck filters without damaging your valuable Canon lens. They can often assess the problem more accurately and apply the necessary force or techniques safely. It’s better to pay a small fee for a professional repair than to risk permanent damage to your lens.
Frequently Asked Questions (FAQ)
Q1: What’s the first thing I should try if my Canon lens filter is stuck?
Start with the simplest method: ensure a firm grip using your hands or a rubber glove/jar opener. Then, try gently twisting the filter counter-clockwise. Consistent, gentle pressure is key.
Q2: Can I use pliers to remove a stuck Canon lens filter?
It’s highly discouraged. Standard pliers can easily scratch or damage the filter and, more importantly, the threads of your Canon lens. If you must use a gripping tool, opt for a specialized filter wrench with soft jaws, and use it with extreme caution.
Q3: How can I prevent my Canon lens filters from getting stuck in the future?
Always screw filters on gently and straight, ensuring the threads are aligned. Tighten them only until snug, not forced. Avoid overtightening. Also, keep your filters and lens threads clean and store your gear in stable temperature conditions when possible.
Q4: What if the filter is cross-threaded on my Canon lens?
If you suspect cross-threading, stop immediately. Try to gently twist it back and forth a tiny bit to see if you can realign the threads. If it immediately feels very resistant or stuck, don’t force it. Remove the camera from the lens if possible and seek professional advice, as continued forcing can strip the threads.
Q5: My filter is really on tight. Can I use WD-40 or oil?
No, avoid using lubricants like WD-40 or oil. These can seep into your lens elements, damage coatings, or attract dust, creating more problems than they solve. Stick to mechanical methods like improved grip and gentle force.
Q6: I accidentally screwed two filters together on my Canon lens, and now they are stuck. What should I do?
This is a common issue. Try gripping the inner filter with one hand (or tool) and the outer filter with another, twisting in opposite directions. If they are very stuck, use the rubber grip or rubber band trick on each filter to improve your hold before attempting to separate them.
Q7: Is it safe to put my Canon lens with the stuck filter in the fridge?
You can try placing the lens in the refrigerator (not freezer) for about 30 minutes. The slight contraction of the metal might help loosen the filter. Remove it promptly and try to unscrew it. Be cautious of condensation when bringing it back to room temperature.
Conclusion
A stuck lens filter on your Canon camera can be a source of anxiety, but as we’ve explored, there are several effective and beginner-friendly methods to remove it. By understanding why filters get stuck and employing patient, gentle techniques, you can usually free your lens. Always start with the least invasive solutions, like improving your grip with rubber accessories or the rubber band trick. Remember to apply steady, even pressure and avoid brute force. If all else fails, don’t hesitate to consult a professional to prevent costly damage to your gear. With these tips on how to remove lens filter Canon, you’re well-equipped to handle this common photographic hiccup and get back to capturing those memorable shots.