
Keep your All-in-One (AIO) cooler running at its best with simple cleaning. For optimal performance, dust your AIO fans and radiator every 3-6 months, and deeper clean the radiator and pump if experiencing noise or heat issues, typically once a year. This guide makes AIO maintenance easy.
Key Takeaways
- Dust AIO fans and radiator regularly for better airflow.
- Clean your AIO cooler every 3-6 months for general upkeep.
- Address performance drops with deeper AIO cleaning annually.
- Use compressed air for quick fan and dust removal.
- Check for leaks and pump noise as indicators for cleaning.
- Maintain your AIO for longer component life and quiet operation.
Introduction
Your computer’s All-in-One (AIO) liquid cooler is a powerhouse when it comes to keeping your CPU temperatures in check. But like any piece of hardware that works hard, it needs a little TLC to perform at its peak. You might be wondering, “How and how often should I clean my AIO cooler?” It’s a common question, and the good news is that keeping your AIO in top shape is simpler than you think. This guide will walk you through the easy steps to maintain your AIO cooler with our comprehensive AIO maintenance guide, ensuring your system stays cool, quiet, and efficient for years to come.
Understanding Your AIO Cooler
Before we dive into cleaning, let’s quickly understand what an AIO cooler is. Unlike traditional air coolers that use large heatsinks and fans, an AIO uses a closed-loop system. This system consists of:
- A Pump: This is usually attached to the CPU block and circulates the liquid.
- A Radiator: This is a finned structure where heat from the liquid is dissipated into the air.
- Fans: Mounted on the radiator, these fans push or pull air through the fins to cool the liquid.
- Tubing: Connects the pump, CPU block, and radiator, allowing the liquid to flow.
- CPU Block/Waterblock: Sits directly on the CPU, absorbing its heat and transferring it to the liquid.
All these parts work together to move heat away from your CPU. Dust and debris can clog up the fins of the radiator and the blades of the fans, hindering this process. This is why regular cleaning is crucial for maintaining optimal cooling performance.
How Often Should I Clean My Aio Cooler?
The frequency of cleaning your AIO cooler depends on a few factors, primarily your environment and how hard your system is working. However, a good general guideline is:
- Every 3-6 Months: For a basic dusting of accessible parts like fans and the exterior of the radiator. This is generally sufficient for most users to prevent significant dust buildup.
- Every 6-12 Months: For a more thorough cleaning, especially if you notice decreased performance or hear unusual fan noises. This might involve more careful dusting of radiator fins.
- When Performance Suffers: If your CPU temperatures start creeping up during normal use, or your fans are constantly running at high speeds, it’s a clear sign your AIO might be clogged and needs cleaning.
Consider your environment. If you have pets that shed, live in a dusty area, or smoke around your PC, you might need to clean your AIO more frequently, perhaps every 2-3 months.
How to Clean Your Aio Cooler: A Step-by-Step Guide
Cleaning your AIO cooler can seem daunting, but it’s a straightforward process. We’ll break it down into manageable steps. Always ensure your PC is completely powered off and unplugged before starting any cleaning.
Step 1: Preparation and Safety
Before you begin, gather your tools:
- Compressed air can (with a thin straw attachment)
- Soft brushes (like a clean paintbrush or makeup brush)
- Microfiber cloths
- Isopropyl alcohol (90% or higher) and cotton swabs (for stubborn grime, optional)
- A small, non-static-prone container (to hold screws if you remove components)
Crucially, ensure your PC is powered off and unplugged from the wall outlet. Static electricity can damage sensitive components, so if possible, ground yourself by touching a metal part of your PC case before touching any internal parts.
Step 2: Accessing the AIO Cooler
You’ll need to open your PC case. Most cases have side panels that can be removed by unscrewing a few screws or using a quick-release latch. Refer to your PC case manual if you’re unsure how to open it.
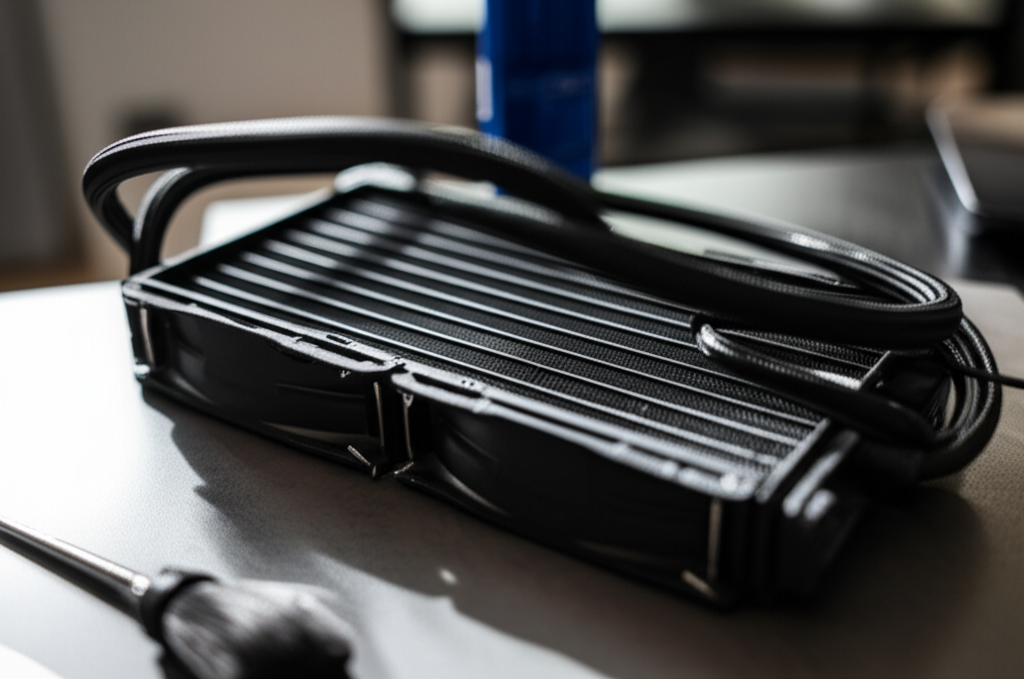
Once the case is open, locate your AIO cooler. It’s usually mounted to the top, rear, or front of the case, with the radiator and fans visible, and the pump/CPU block connected via tubes.
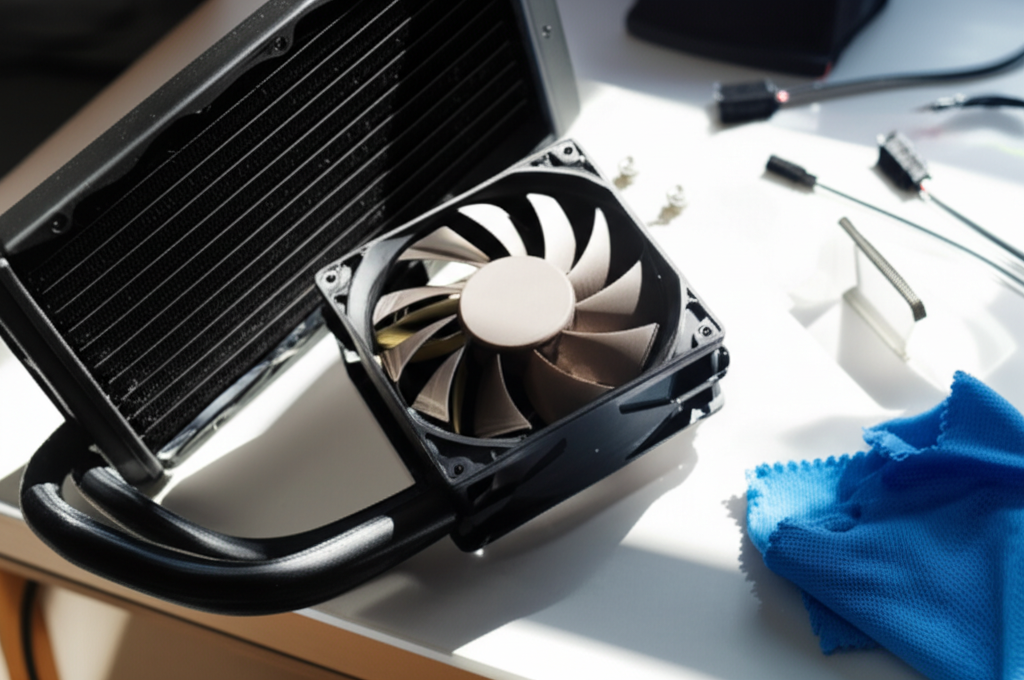
Step 3: Cleaning the Fans and Radiator Exterior
This is the most frequent cleaning you’ll do.
- Fans: Hold the fan blades gently with your finger to prevent them from spinning too fast when you use compressed air. Aim the straw attachment of the compressed air can at the fan blades and motor hub. Give short bursts of air to blow out dust. Use a soft brush to dislodge any stubborn dust that the air doesn’t remove.
- Radiator Fins: The radiator looks like a metal grid with many thin fins. Dust loves to settle here. Point the compressed air can at the radiator fins, aiming from the inside of the case outwards if possible (or from the outside inwards, depending on where your radiator is mounted and how your fans are oriented). You want to blow the dust out of the radiator. Use short bursts. If dust is heavily caked on, you might need to gently use a soft brush to loosen it before using compressed air again.
Pro Tip: If your AIO fans are obscuring access to the radiator, you might need to temporarily unscrew the fans from the radiator to get better access to the fins. Make sure to keep track of the screws!
| Cleaning Task | How Often | Tools Needed | Focus Area |
|---|---|---|---|
| Basic Dusting | Every 3-6 Months | Compressed Air, Soft Brush | Fans, Radiator Exterior |
| Thorough Cleaning | Every 6-12 Months (or as needed) | Compressed Air, Soft Brush, Microfiber Cloth | Radiator Fins, Fan Blades, Pump Housing |
| Deep Clean/Performance Check | Annually (or if temps rise) | All above, Isopropyl Alcohol (optional) | All areas, checking for leaks/blockages |
Step 4: Cleaning the Pump and CPU Block (Optional but Recommended for Deeper Cleans)
The pump and CPU block are less prone to dust but can accumulate grime over time. If you’re doing a deeper clean:
- CPU Block Surface: Gently wipe down the exterior of the CPU block and pump housing with a dry microfiber cloth. If there’s any sticky residue, you can lightly dampen a cotton swab with isopropyl alcohol and gently clean the affected area. Be very careful not to let any liquid seep into the internal components or fan motors.
- Pump Housing: Ensure no dust has accumulated around the pump’s exhaust or intake points. A soft brush and compressed air can be used here, but be gentle.
Note: Most AIO coolers have a sealed loop. You should not need to open the pump or the CPU block itself. Tampering with these parts can void your warranty and damage the cooler.
Step 5: Reassembly and Testing
Once you’re satisfied with the cleaning:
- Carefully reattach any components you may have removed (like fans).
- Ensure all cables are securely connected.
- Close up your PC case.
- Plug your PC back in and power it on.
- Monitor your CPU temperatures using software like HWMonitor or your motherboard’s BIOS. Temperatures should ideally be lower or the same as before cleaning, and fan noise should be reduced.
When to Consider a Deeper AIO Maintenance
Sometimes, basic dusting isn’t enough. You might need to consider a deeper clean or even professional help if you notice any of these signs:
- Noticeable Temperature Increase: If your CPU temperatures are consistently higher than they used to be during idle or load, despite no changes in software or ambient room temperature.
- Increased Fan Noise: Fans running at higher RPMs than normal, or making grinding/whirring sounds, can indicate dust buildup or bearing issues.
- Pump Noise: Unusual gurgling, rattling, or whining sounds from the pump can indicate problems within the loop, possibly air bubbles or impeller issues.
- System Instability: Frequent shutdowns or performance throttling due to overheating.
A deeper clean might involve ensuring optimal fan orientation for radiator airflow, checking for obstructions in the tubing, and potentially even a full system shutdown and careful dusting of all fans and radiator fins. If you suspect a more serious internal issue with the pump or radiator, it might be time to contact the manufacturer for warranty service or consider replacing the AIO.
Why AIO Maintenance Matters
Your AIO cooler is a vital component for your PC’s health and longevity. Neglecting its maintenance can lead to several problems:
- Reduced Performance: An overheated CPU will automatically reduce its clock speed (throttle) to prevent damage, leading to slower performance in games and applications.
- Component Lifespan: Prolonged exposure to high temperatures can reduce the lifespan of your CPU and other internal components.
- Noise Issues: Dust-clogged fans have to work harder, leading to increased noise. A failing pump can also produce annoying sounds.
- System Instability: Severe overheating can cause unexpected shutdowns and system crashes.
- Costly Repairs or Replacements: Overheating can potentially damage other components, leading to expensive repairs or the need to replace entire parts.
A small amount of regular maintenance can prevent these costly and frustrating issues. Think of it like changing the oil in your car; it’s a crucial part of keeping the engine running smoothly for a long time.
Common AIO Cooler Issues and How Cleaning Helps
Let’s look at some common problems and how a clean AIO system can solve them:
Issue: CPU Overheating
Cause: Dust buildup on radiator fins and fans restricts airflow, preventing heat dissipation. This is the most common reason for overheating. A clogged loop can also reduce coolant efficiency.
Solution: Thoroughly clean the radiator fins and fans with compressed air and a brush. Ensure fans are oriented correctly to push air through the radiator effectively. For persistent issues, a deeper clean to check for internal blockages might be necessary.
Issue: Loud Fan Noise
Cause: Dust accumulating on fan blades makes them unbalanced, leading to vibration and noise. Fans also have to spin faster to compensate for restricted airflow.
Solution: Clean the fan blades and hubs with compressed air and a soft brush. Ensure fans are securely mounted. If a fan makes grinding or rattling noises even after cleaning, it might be failing and require replacement.
Issue: Pump Gurgling or Whining
Cause: This can sometimes indicate air bubbles in the AIO loop. While not always directly related to dust, improper installation or a slow leak can introduce air over time. In rare cases, a struggling pump due to debris could also cause noise.
Solution: For air bubbles, you can try gently tilting the case in different directions with the PC powered off (but not running) to help dislodge them and move them towards the radiator or reservoir. If the noise persists or is very loud, it might indicate a pump malfunction. Check for any visible leaks around tubing connections.
Issue: Reduced Cooling Performance Over Time
Cause: Gradual dust accumulation in the radiator and on fans is the primary culprit. In very rare cases, the coolant within the AIO loop could potentially degrade over many years, though this is uncommon in typical AIO lifespans.
Solution: Regular cleaning as outlined in this guide is the best preventative measure. Ensuring your AIO is mounted correctly with proper airflow from your case fans is also critical.
Frequently Asked Questions (FAQ)
Q1: Can I spray liquid directly onto my AIO cooler to clean it?
A: Absolutely not. Never spray liquid directly onto any PC component, including your AIO cooler. Use compressed air and dry cloths. If you need to clean stubborn grime, use isopropyl alcohol sparingly on a cotton swab, ensuring no excess liquid drips onto electronics.
Q2: Do I need to remove the AIO cooler completely to clean it?
A: For basic dusting of fans and radiator exteriors, usually not. You can often clean these effectively with just the case open. However, for a deep clean of radiator fins or if you suspect internal issues, temporarily removing the radiator and fans might be necessary for better access. Always refer to your AIO’s manual if you are unsure.
Q3: My AIO is making gurgling noises. What should I do?
A: Gurgling noises often indicate air in the loop. Try gently tilting your PC case in various directions while it’s powered off to help air bubbles move to the radiator. If the noise persists or is very loud, it could be a pump issue. Monitor your CPU temperatures closely.
Q4: How do I know if my AIO cooler is failing?
A: Signs of a failing AIO include consistently high CPU temperatures, loud or unusual noises from the pump or fans, pump failure (leading to rapid overheating), or visible leaks. If you suspect failure, contact the manufacturer for warranty support or consider a replacement.
Q5: Can I use a regular vacuum cleaner to clean my AIO?
A: It’s generally not recommended. Vacuum cleaners can generate static electricity that can damage components. Also, the suction might be too strong and could potentially damage delicate fan blades or radiator fins. Compressed air is the safest and most effective tool for dust removal.
Q6: Is it safe to clean the pump housing with isopropyl alcohol?
A: Yes, it is generally safe to use a small amount of high-percentage isopropyl alcohol (90%+) on a cotton swab to clean the exterior of the pump housing for grime removal. Ensure the alcohol evaporates completely before powering on your PC and be extremely careful not to let any liquid drip into the pump motor or electrical connections.
Conclusion
Maintaining your All-in-One (AIO) liquid cooler is an essential part of PC care that often gets overlooked. By understanding how and how often to clean your AIO cooler, you ensure your system runs efficiently, stays cool under pressure, and maintains its quiet operation. A simple routine of dusting your fans and radiator every 3-6 months, with a more thorough check-up annually or whenever performance dips, will go a long way. Remember to always prioritize safety by powering off and unplugging your PC before you begin. With this straightforward AIO maintenance guide, you can confidently keep your AIO cooler in optimal condition, protecting your valuable components and enjoying a smooth, reliable computing experience for years to come.